7/11/2012

The History of DivX and the Latest Software Players That Can Play DivX


DivX is known to create a balance between file size and quality with its very effective compression capabilities. Due to these capabilities, it becomes one of the codecs used for extracting audio and video from a source to the hard disk of the PC for archiving and transcoding copies. And many software developers released their own styles of DivX players.
The commercial DivX in competition with Microsoft video for Windows in WMV, QuickTime from Apple in the MOV and Real Video in the RMM file formats. A version of open source Xvid is released by Xvid in 2001.

THE HISTORY OF DIVX

The history of DivX should be traced back to 1998. It was a hacked version of Microsoft’s MPEG-4 version 3. Two French hackers reverse-engineered the MPEG-4 format and came up with an MPEG format encapsulated in AVI instead of ASF it originally had. After that, DVD hacking community enhanced the format, and had the DivX version 3.0. From 2002, the DivX, Inc continued to enhance the DivX software and DivX 6.6 was released in 2007.

LATEST DIVX PLAYER

DivX became widely popular for ripping copy-protected DVD materials for bootleg replication and distribution. Numbers of DVD players are claiming to play DivX materials. The most attractive of the format is that it is free and easy to use. It is versatile and can be used with both Windows and Mac computers. You can play it with many software players.
DivX Plus is the latest DivX player and it is free for Windows, while a Mac version called DivX 7. Besides, there are many other DivX players, such as Windows Media Player 11, Media Player Classic, VLC Player, Songbird, DVD X Player, etc.
Among these latest DivX players, DVD X Player 5.5 is a multifunctional media player software which can play types of media contents like VCD, SVCD, DVD, audio, videos. It also has the ability to record DVD and convert movies to iPod, iPhone, etc. There are frequently free minor updates and free technical documents available on its offical website: dvd-x-player.com.

6/28/2012

How to Make a Memorable Graduation Photo Slideshow?


If you are going to graduate from school, you must feel unwilling to part, but happy to see a glorious future. Graduation is both a hard and good time. It is hard because you have to say goodbye to your teachers, friends, also starting a new journey is good for celebrating.
At this contradictory moment, to make a memorable graduation photo slideshow and send it as gifts is a good choice to show your affections. For this purpose, you need a photo slideshow maker, like Aviosoft Video Converter, which will help you accomplish this task.
Aviosoft Video Converter Ultimate has a built-in slideshow maker, which would enable to combine photos, music, and text into slideshow and convert it into mobile formats (playable on Apple devices, HTC, BlackBerry, Nokia, Sony PSP, PS3, media players, etc). With it, you can add title, credits, background music, and transition effects to personalize the graduation photos.

GUIDE ON HOW TO MAKE GRADUATION SLIDESHOW

All you need to do is to import your photos and arrange the orders in the Slideshow window, in which you are all on your own to create a personalized graduation slideshow with 12 special effects. Following I will show you the details.

Step 1. Import Photos

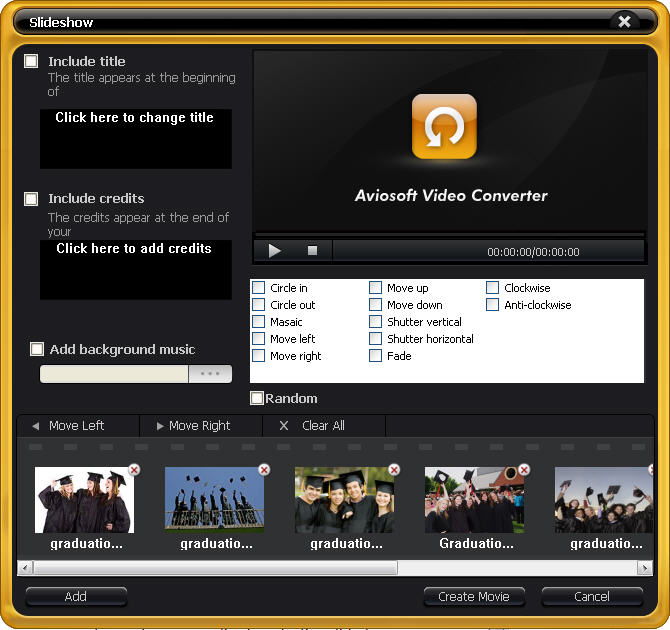
After launching the program, click the “Slideshow” button to open the sideshow making window. Click the “Add” button to import your graduation photos into it.
import graduation pics

Step 2. Add Background, Title, Credits, Effects

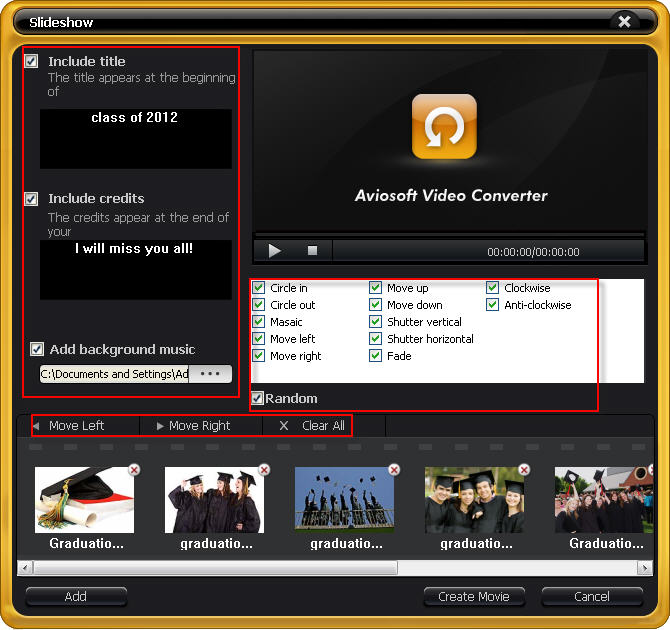
In addition, you can even add background music and subtitles to the photo slideshow to make your work much more expressive. Click the “Add background music” button to customize it. And you can include title and credits in the slideshow.
Rearrange the order of pictures by selecting the picture and moving left or right to make them well-organized. Choose one or multiple special effects to make it different.
add title music effects

Step 3. Create Slideshow & Convert

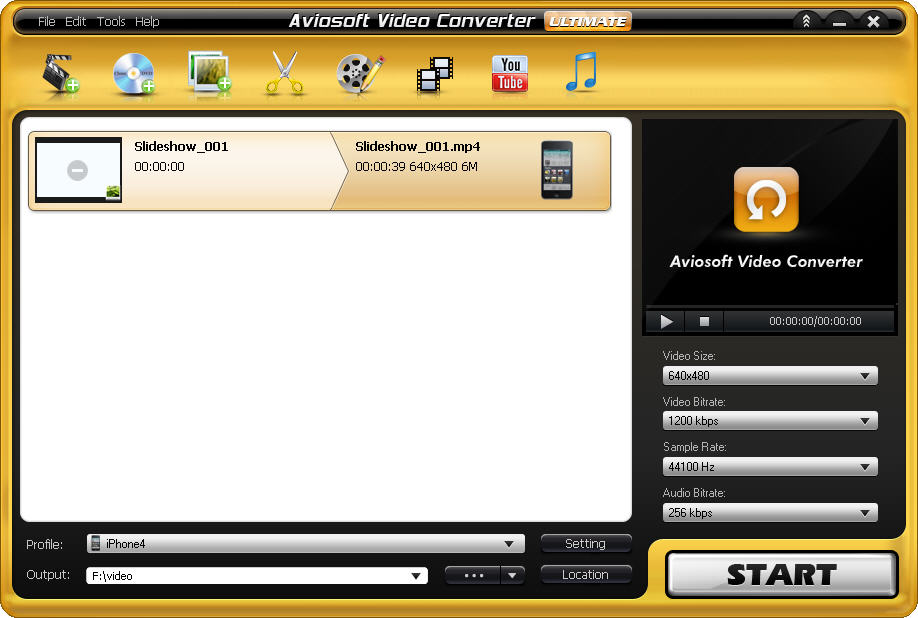
After all editing work finishes, directly “Create Slideshow” and save it as iPad / iPhone video. And you can also convert it to other format.
create slideshow

6/20/2012

How to Download Video from YouTube and Convert to Apple Devices?


Have you ever watched a video on YouTube and love so much, and want to watch it over again? With Aviosoft Video Converter, you can download YouTube video and save it on your PC.  You can even put the video that you love on portable devices for better enjoyment, such as put YouTube on remarkable Apple iPad, iPhone, iPod, etc.
Apple devices are popular and have high resolutions which are perfect for video playback. But Apple devices do not support YouTube Videos. To play YouTube videos on iDevices, you need to convert the downloaded videos to a format that supported by iDevices.   Aviosoft Video Converter can help you work all things out.

HOW TO DOWNLOAD YOUTUBE VIDEO

This YouTube downloader can quick download YouTube or Yahoo videos in minutes. With one or two simple clicks, you can get many videos downloaded straight to your PC.

Step 1. Get the YouTube Video URL

Go to YouTube, find the video you want to download, copy the URL.

Step 2. Start Downloading YouTube Video

Click youtube button to open the download box. Paste the URL in the box. Click Download button to begin downloading. Wait until the process finishes.
download youtube

CONVERT YOUTUBE TO APPLE DEVICE

With the help of the video converter itself, you can tanscode videos to files which are universal.

Step 1. Add YouTube Videos

After downloading, go back to the main interface, add YouTube files by clicking “Add file(s)” or directly drag files to the interface. Batch conversion is supported.

Step 2. Set Output Format

Browse to choose the desired device from the preset “Profile”. Here I took iPhone 4 for example.
choose output format

Step 3. Start Converting YouTube

Everything is ready. Just click “Start” to begin the YouTube to iDevice conversion.
Wait for its accomplishment. Then transfer video to your device and enjoy.